September 20, 2026 • Tomás Guerreiro • 11 min reading time • Specs verified June 18, 2026
Valve Box and Manifold Protection Strategy: Choosing, Sizing, and Installing Underground Valve Enclosures
Here’s a scenario that should sound familiar if you’ve gotten any quotes lately: a homeowner in Phoenix needed a 6-valve manifold assembly — that’s a cluster of six electrically operated water control valves (solenoid valves) mounted together underground and wired to a central timer — professionally installed. The contractor’s number: $2,000. Instead, he sourced an Orbit preassembled manifold, dropped it into an appropriately sized valve box himself, and described the result as “practically built right out of the box.” Total savings: well over $1,200. That anecdote isn’t an outlier. It’s the economic argument for understanding valve box strategy before you pour a dollar into hardware.
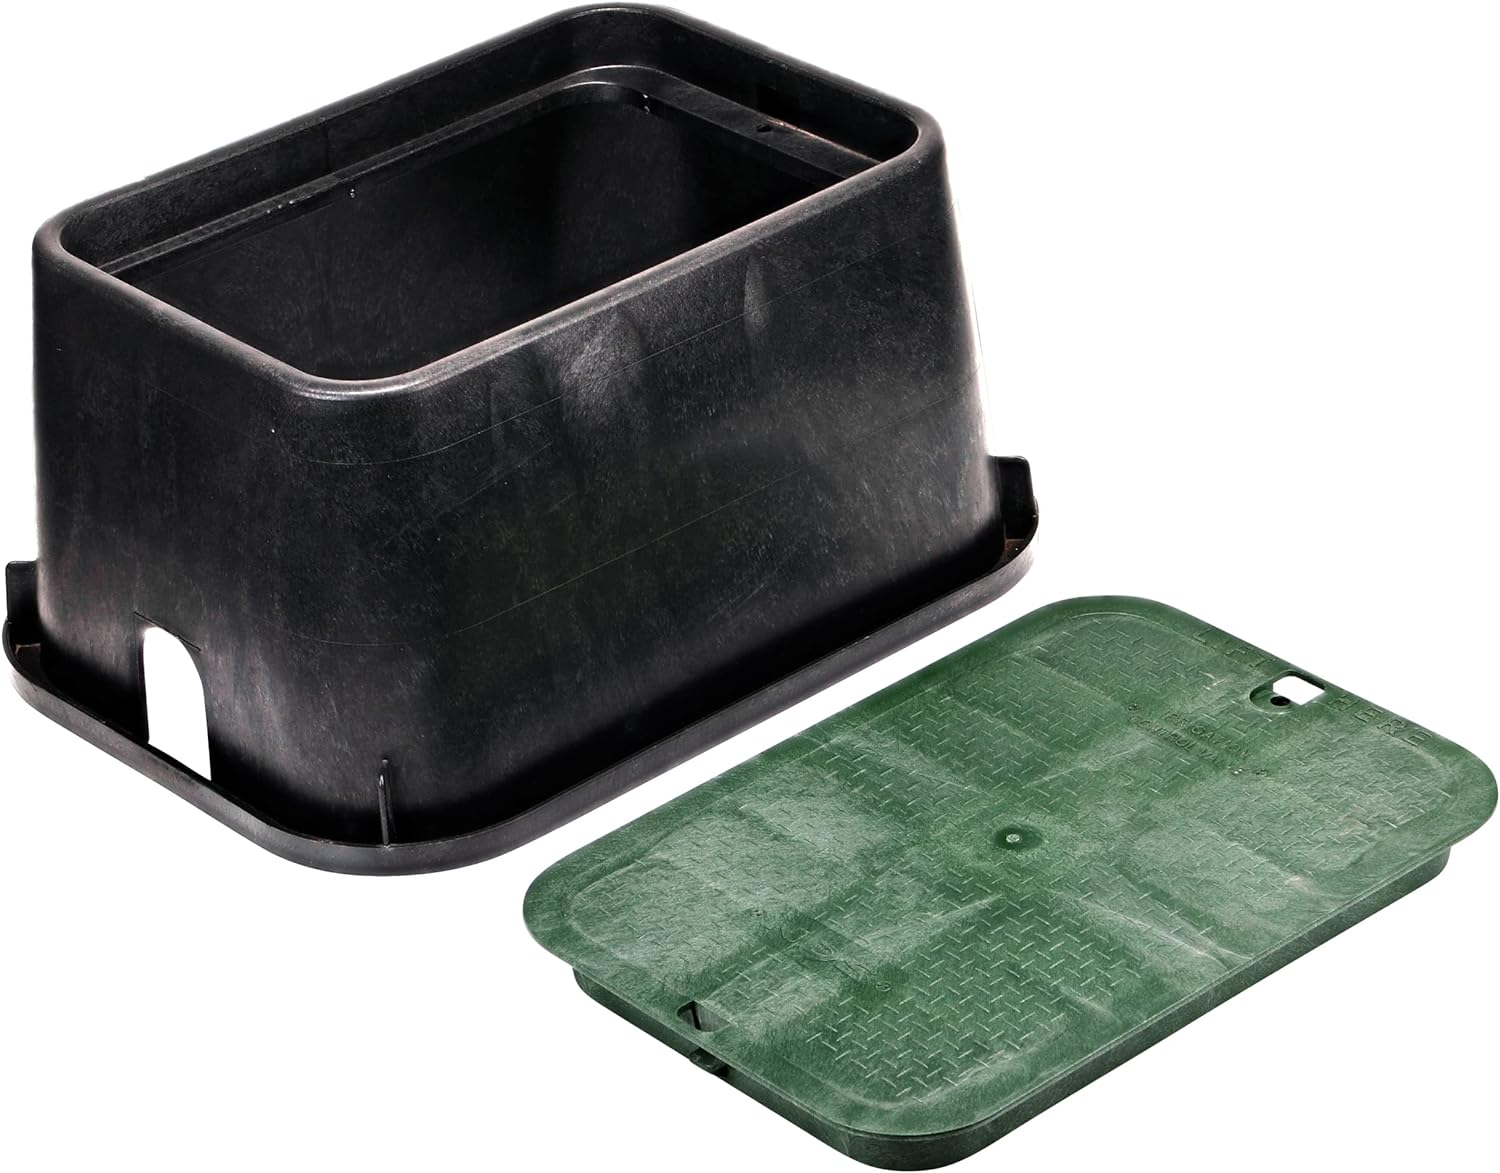
A valve box (sometimes called a valve vault) is the plastic or concrete enclosure set flush with your lawn surface that houses and protects your irrigation valves from soil pressure, freeze-thaw cycles, lawn equipment, and the slow creep of dirt and roots. Get the box wrong — too small, too shallow, wrong shape for your manifold — and you’re either excavating in two years or squeezing a wrench at an angle that makes a simple solenoid swap into a half-day project. Get it right, and every future service call takes under 20 minutes. This guide walks through sizing logic, installation depth, cross-brand compatibility, and the one add-to-cart item most Orbit manifold buyers forget until they’re already at the dig site.
| EDITOR'S PICKOrbit 57253 3-Valve Heavy Duty… | Mid-tierNDS 117BC* 15 in. X 22 in. Rect… | Budget pickOrbit 57184 Double Union Couple… | |
|---|---|---|---|
| Product type | Valve manifold | Valve box | Coupler fitting |
| Valve count | 3 | — | — |
| Box dimensions | — | 15" x 22" | — |
| Height | — | 12 in. | — |
| Shape | — | Rectangular | — |
| Connection type | — | — | Swivel union |
| Price | $64.62 | $52.83 | $4.97 |
| See on Amazon → | See on Amazon → | See on Amazon → |
Why Box Selection Deserves As Much Attention As Valve Selection
Most irrigation planning articles front-load zone logic and PSI budgeting — both genuinely important — and treat the valve enclosure as an afterthought. The Irrigation Association’s Landscape Irrigation Best Management Practices (2023 edition) frames it differently: accessibility and protection of control points is treated as a maintenance-tier issue, not just an installation detail. That framing is correct.
Think about service frequency. Solenoids — the electrically activated plungers that open and close each valve — have a realistic working life that surprises most first-time installers. Operators in long-run reviews note that a solenoid running a typical residential zone may actuate (open and close) over 1,000 times across a 3-year irrigation season before failure rates climb. That’s not bad longevity, but it does mean you will be opening that box. Design for it from day one.
The three failure modes poor box selection creates:
- Crush and heave. An undersized box transmits lateral soil pressure directly to manifold fittings. PVC compression fittings are not designed to carry that load.
- Access constraint. A valve box that’s too shallow or too narrow forces diagonal wrenching on compression nuts and solenoid caps. Cross-threading follows. Leaks follow that.
- Debris infiltration. Boxes without properly seated lids — or lids rated for traffic load — accumulate gravel, root tendrils, and standing water. The University of California Cooperative Extension publication Irrigation System Maintenance and Troubleshooting (UCANR Publication 8044) specifically cites wet, debris-filled valve chambers as a leading cause of premature solenoid dielectric failure.
Sizing the Box: A Practical Decision Framework
The core rule: every valve needs a minimum 3-inch clearance on all sides, and you need enough vertical depth to access the solenoid cap without removing the lid at an angle.
By the Numbers
| Valve Count | Recommended Box Interior (L × W) | Minimum Interior Depth | Box Category |
|---|---|---|---|
| 1–2 valves | 10″ × 10″ | 10″ | Round or small rectangular |
| 3–4 valves (single Orbit manifold) | 14″ × 19″ | 12″ | Standard rectangular |
| 5–6 valves (two manifold sections) | 19″ × 13″ minimum | 12″ | Rectangular, extended |
| 7–12 valves | 24″ × 16″ or jumbo oval | 14–16″ | Jumbo rectangular or jumbo oval |
These dimensions assume manifold pipe runs parallel to the box’s long axis — the standard orientation. If you’re running a header pipe across the short axis, add 4 inches to the short dimension.
The Orbit Manifold Math
The Orbit preassembled manifold pack is configured in 3-valve or 4-valve sections. A single 4-valve section fits comfortably in a standard 14×19 rectangular box with enough clearance to work the solenoids by hand. But here’s the critical add-to-cart flag: if you’re connecting two manifold sections to build a 6- or 8-valve assembly, you need the Orbit double-union coupler (sold separately — search by product name, not by any retailer code). This fitting joins two manifold segments with compression-release unions on both ends, which means you can disconnect either section without cutting pipe. Reviewers consistently flag its absence as the most common “I had to make a second trip” mistake in manifold builds. It does not come included in the manifold packs. Order it before the first section arrives.
With two manifold sections joined by the double-union coupler, your assembled run will likely require a jumbo rectangular box — approximately 24 inches long — to maintain service clearance on the end solenoids.
Base Installation: Elevation, Shimming, and the Case for a Pre-Formed Base
One of the tedious realities of traditional valve box installation is achieving a stable, level base at the correct elevation without the box rocking on uneven trench bottom. The old-school fix is stacking bricks or pea gravel under the box feet — a technique that works but shifts over time as soil consolidates.
The Orbit 53230 molded base addresses this directly. Installers who have used it across multiple projects report that it eliminates shimming entirely: the base sets a defined height relationship between the box floor and the valve inlet ports, and — this is the cross-brand compatibility detail worth bookmarking — it is confirmed by reviewers to accept NDS riser covers. If you’re using NDS lids (common in commercial installs and shared-infrastructure applications), you’re not locked into an all-Orbit assembly. That interoperability matters when you’re sourcing components from different distributors across multiple properties.
Installation Depth: The Correct Answer Is “It Depends on Your Zone”
The lid should sit flush with finish grade — or no more than ¼ inch above in mow-over zones — but the depth of the box below grade is driven by two variables:
- Frost line. EPA WaterSense guidance (Water-Efficient Landscaping: Preventing Pollution and Using Resources Wisely, 2024 edition), echoed in Irrigation Association recommendations, specifies that valve manifolds in freeze-susceptible climates should be positioned so that the inlet pipe enters the box below the local frost line. In USDA Zones 5 and colder, that typically means your inlet pipe penetrates the box side at 18–24 inches of depth, with the box itself extending upward to grade. In Zone 8 and warmer, the standard 10–12 inch deep box is sufficient.
- Pipe entry point. Your mainline lateral enters the box from the side, not the bottom. The box depth needs to accommodate the pipe entry point plus the vertical height of the valve body above it. Budget 6–8 inches of clearance above the pipe entry for the valve body, solenoid, and your hand.
This Old House’s editorial guide How to Install an In-Ground Sprinkler System recommends setting the box in compacted granular fill (3/4-inch clean stone works) rather than native soil, specifically to prevent settlement that causes lid edges to drop below grade and create a trip hazard or mow-over crush point.
Beyond Zone Valves: The Isolation Valve Use Case
A common design gap in DIY systems is treating the valve box as exclusively a zone-valve enclosure. It isn’t. Reviewers of jumbo valve boxes — the NDS jumbo oval format being a frequently cited example — have documented installations housing main-line gate valves, backflow preventer isolation valves, and shared-well shutoffs for private road systems. The logic is the same: a buried valve that needs occasional manual operation needs a labeled, accessible, weather-protected home.
If you’re spec’ing a system that includes a master valve (a normally-closed valve at the mainline that only opens when a zone is active, protecting against leaks when the controller isn’t running), that master valve typically sits in its own small dedicated box at the point of connection — not in the zone manifold box. Keep that box separate and label it clearly. Family Handyman’s irrigation installation reference (Irrigation Valve Box Installation Tips) specifically calls out master valve box labeling as a service-cost reducer: a plumber or irrigation tech who can immediately identify the main shutoff saves 15–20 minutes of diagnostic time on every service call.
Mixing Brands: Can You Put Hunter PGV Valves in an Orbit Manifold Box?
The short answer: yes, with planning. The longer answer involves understanding that “manifold” can mean two things. A preassembled manifold (Orbit’s format) is a molded PVC body with valve ports built in — the valve and the manifold are integrated. A field-assembled manifold uses a separate header pipe (typically 1-inch PVC or poly) with individual valve tees solvent-welded or compression-fitted along the run, and each zone valve (Hunter PGV, Rain Bird DV, or similar) threads onto its own tee.
If you want Hunter PGV valves for their flow-adjust capability and longer solenoid service record, build a field-assembled header and size your box to the header run plus valve clearances. The sizing math from the table above still applies. What you cannot do is thread a Hunter PGV onto an Orbit preassembled manifold body — the port threading and valve-seat geometry aren’t interchangeable. Pick your platform at the manifold level and stay consistent within a box.
Buying Decision: If X, Then Y
Here’s the decision tree that covers most residential and light-commercial scenarios:
-
If you’re building a 3–4 zone system with an Orbit preassembled manifold: One manifold section fits a standard rectangular box. Add the Orbit 53230 base for level, shimless installation. Skip the double-union coupler — you don’t need it for a single section.
-
If you’re building a 5–8 zone system by linking two Orbit manifold sections: Order the Orbit double-union coupler by name before anything else. Upgrade to a jumbo rectangular box. Confirm your jumbo box accepts NDS-format lids if you’re mixing components across a multi-property portfolio.
-
If you’re running Hunter PGV or Rain Bird DV valves in a field-assembled header: Size your box off the header pipe run, not a manifold template. Budget for a jumbo oval or a 24×16 rectangular box for anything over 5 valves, and set the box in 3/4-inch clean stone backfill.
-
If you’re in USDA Zone 6 or colder: Your mainline must enter the box below frost line. A 10-inch-deep box is not sufficient. Spec a 14–16 inch interior depth box and confirm pipe entry point geometry before trenching.
-
If the box will house an isolation valve or master valve (not a zone manifold): A smaller round or standard rectangular box works fine — size it to the valve body width plus 3 inches on each side. Label the lid.
The $2,000 contractor quote that opened this article wasn’t for rare expertise. It was for work that, with the right box, the right manifold, and one forgotten coupler pre-ordered, most serious DIYers can complete in a Saturday morning. Know your frost line, count your valves, order the double-union coupler by name, and build for the service call you’ll need in year three.
Frequently Asked Questions
What size valve box do I need for a 4-zone Orbit manifold? A standard rectangular box with a 14×19 inch interior footprint and 12-inch depth provides adequate clearance for a single 4-section Orbit manifold assembly with room to work the solenoids by hand. If you’re in a freeze-prone climate and need deeper pipe entry, step up to a box with 14-inch interior depth.
Do I need to buy the double-union coupler separately to connect two Orbit manifolds? Yes — unambiguously. The Orbit double-union coupler is not included in manifold packs and is a required component for linking two manifold sections. Search for it by product name at your preferred retailer. Not having it on hand is the most commonly reported installation-day mistake in Orbit manifold reviews.
How deep should the valve box be set below grade? The lid should sit flush with finish grade (or ¼ inch proud in mow-over areas). The box’s interior depth depends on your frost line and pipe entry elevation. In warm climates (Zone 8+), a standard 10–12 inch box is sufficient. In Zone 6 and colder, your mainline entry must clear the frost line — typically requiring 18–24 inches of burial depth for the pipe, which drives you to a 14–16 inch interior box or a separate offset installation.
What is the expected lifespan of a solenoid in a preassembled manifold? Based on operator reports in long-run reviews, a solenoid in a typical residential application running daily during the irrigation season reaches approximately 1,000 actuations over 3 years before failure rates become notable. That’s a reasonable service life, but it underscores the value of designing your box for easy solenoid access — a $12 solenoid swap should never require excavation.
Can I mix Orbit manifold sections with Hunter PGV valves in the same box? Not on the same manifold body. Orbit preassembled manifold ports are not compatible with Hunter PGV threading. If you want Hunter valves, build a field-assembled PVC header and size your box to that header run. You can absolutely house a field-assembled Hunter header and an Orbit preassembled segment in the same box if they’re on separate header runs and the box is large enough, but they won’t share a manifold body.