September 16, 2026 • Tomás Guerreiro • 11 min reading time • Specs verified June 18, 2026
Drip Emitter Selection Deep Dive: Rain Bird SW20 Spot Drippers, MIXC Kits, and the Manifold Strategy That Ties It Together
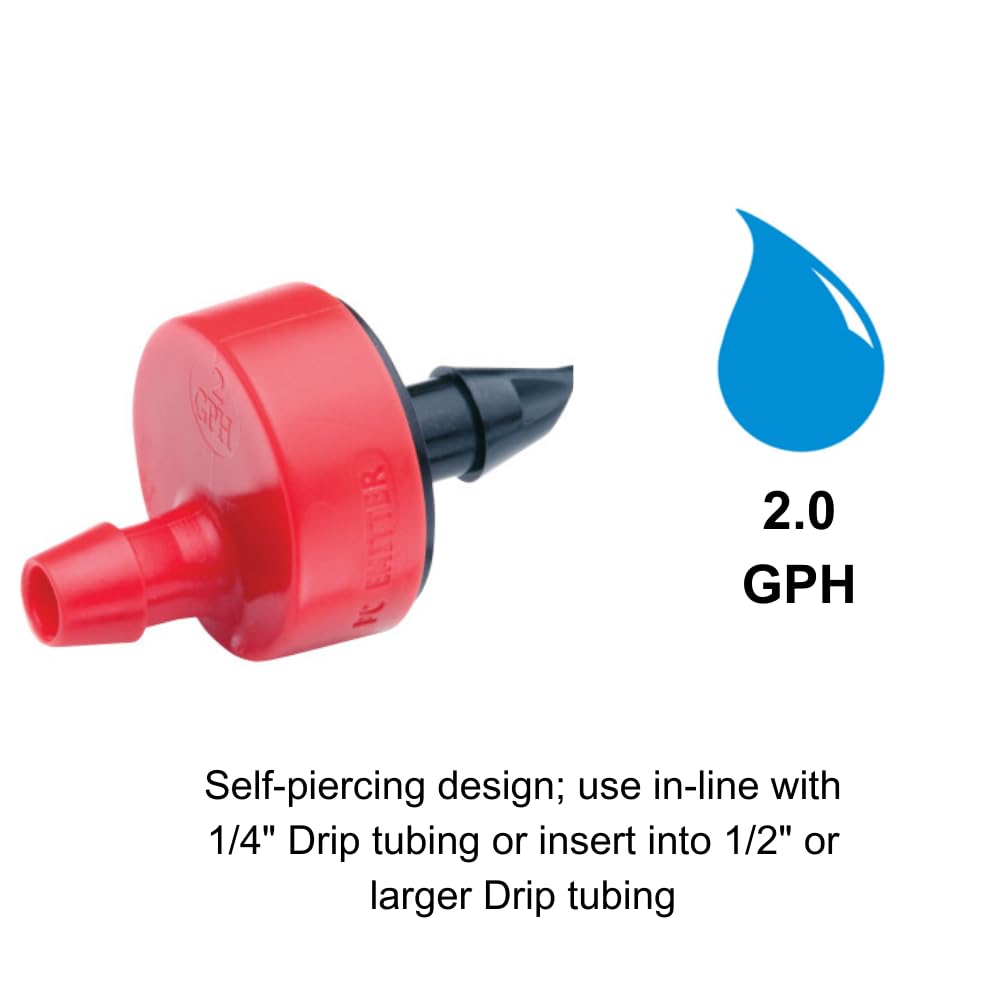
Drip irrigation sounds complicated until you see what it actually is: tiny fittings — called emitters — that deliver a slow, measured trickle of water directly to a plant’s root zone instead of spraying water into the air where it can evaporate or miss entirely. A manifold is a central hub, usually with multiple ports, that splits one supply line into several emitter lines — think of it like a power strip for water. Getting these two pieces right is where most DIY drip systems either shine or quietly waste hundreds of gallons a season. This guide breaks down two of the most-discussed emitter options — the Rain Bird SW20 spot dripper and the MIXC all-in-one kit emitters — runs the tradeoff math on each, and shows you how a pressure-regulating manifold ties the whole thing into a system you can actually manage.
If you already know GPH (gallons per hour, the flow rate an emitter delivers) and PSI (pounds per square inch, your water pressure), you’re ready for the practitioner-level detail below. If not, bookmark the quick definition above and keep reading — this article stays plain-language throughout.
| EDITOR'S PICKRain Bird Rotor Heads 5000 Roto… | Mid-tierRain Bird MANIFRE6S Drip Irriga… | Budget pickHunter MP Rotator MP2000-360° N… | |
|---|---|---|---|
| Pack Size | 4-Pack | 6-Port | — |
| Fitting Size | — | 1/2" NPT x 1/4" | — |
| Regulation | — | Unregulated | — |
| Adjustable Arc | — | — | ✓ |
| Radius | — | — | 13–21 ft |
| Type | Rotor | Manifold | Nozzle |
| Price | $53.95 | $7.99 | $7.68 |
| See on Amazon → | See on Amazon → | See on Amazon → |
The GPM/PSI Budget Comes First — Always
Before any emitter selection conversation makes sense, you need to know what’s arriving at your valve. Colorado State University Extension’s drip irrigation guide for home gardens is direct on this: drip zones typically operate best between 15 and 30 PSI. Most residential systems run 40–80 PSI at the meter, which means a pressure regulator somewhere upstream of your drip network is not optional — it’s structural.
The math that matters before you spec emitters:
| Variable | Target Range |
|---|---|
| Drip zone operating pressure | 15–30 PSI |
| Typical emitter flow rate (shrubs) | 1–2 GPH |
| Typical emitter flow rate (annuals) | 0.5–1 GPH |
| Max recommended zone flow (¾” poly mainline) | ~220 GPH |
Once you know your pressure-regulated zone pressure and your mainline’s safe flow ceiling, emitter selection is a straightforward capacity exercise: count your plants, multiply by the appropriate GPH per plant, confirm the total stays under your mainline limit, and pick an emitter format that fits your installation context.
The Irrigation Association’s Drip/Micro Irrigation Best Management Practices document flags one consistent field failure: installers who skip the flow-budget calculation and then wonder why their outer emitters on a long run are barely trickling while emitters near the manifold are flooding. Pressure-compensating emitters (which maintain consistent output across a range of input pressures) solve part of this — but they don’t solve a clogged filter or an undersized mainline.
Rain Bird SW20: Why the Barb Design Is the Real Story
The Rain Bird SW20 is a pressure-compensating spot dripper rated for 2 GPH output across a wide pressure range. Spec sheets put consistent output from roughly 15 to 50 PSI, which is a meaningful operational window for zones that might see slight pressure variation.
What reviewers keep coming back to isn’t the pressure compensation — it’s the off-center barb geometry. Owners consistently report that the angled barb design makes insertion into ½” poly tubing distinctly easier than competing barbed emitters, particularly in cold-weather installs when tubing stiffens. Multiple reviewers who switched from generic red-cap emitters describe the contrast as “extreme” in Rain Bird’s favor — the SW20 seats cleanly with hand pressure where the red-cap alternatives required pliers and sometimes still leaked at the barb.
For an experienced installer running twenty or thirty emitters in an afternoon, that ergonomic difference compounds into real time savings and fewer barb-related micro-leaks at the insertion point. The EPA’s WaterSense program notes that poorly seated barbed connections are one of the leading sources of unmeasured water loss in residential drip systems — so ease of installation isn’t just a comfort metric, it’s a system integrity metric.
Where the SW20 fits best:
- Established shrub beds where consistent 2 GPH output matches root-zone demand
- Zones where you want pressure compensation without moving to a more expensive adjustable emitter
- Installs where you’re doing volume work and barb-seating speed matters
Where to think twice:
- Newly planted annuals or small perennials that need less than 1 GPH — the SW20’s fixed 2 GPH rate may be more than a 4-inch seedling can absorb without surface puddling
- Mixed-plant beds with wildly different water needs, where a fixed-rate emitter can’t accommodate variation without running multiple zones
MIXC Kits: Real-World Flexibility With a Calibration Caveat
MIXC drip kits take a different approach: adjustable emitters with a dial that lets you set flow anywhere from nearly zero to a maximum that varies by model. The appeal is obvious — one emitter SKU can serve a large container, a shrub, or a groundcover bed, just by adjusting the dial.
MIXC kit owners are broadly positive across aggregated reviews, and a meaningful data point for anyone worried about the aesthetics of surface-run drip lines: owners who buried MIXC tubing under mulch report a year of reliable operation with no component failures. That matters because one of the persistent objections to drip in ornamental beds is the visual clutter of exposed black poly tubing.
But there’s a calibration issue worth naming directly. A notable reviewer flagged that MIXC emitters can be set to flow rates high enough — at or near maximum — to functionally defeat the purpose of drip irrigation, delivering water faster than soil can absorb it and producing surface runoff instead of deep penetration. The UC ANR’s drip irrigation guidance for home landscapes makes this principle explicit: emitter flow rate must be matched to soil infiltration rate, not just to plant size. Clay soils infiltrate at roughly 0.2–0.5 inches per hour; sandy soils at 1–3 inches per hour. An emitter set to maximum on a clay-heavy bed can saturate the surface in minutes while leaving the root zone dry.
The fix is simple: use the dial intentionally. Start at the lowest setting that delivers adequate water in your scheduled runtime, and increase only if plants show drought stress. The adjustability is the kit’s strength — but it requires the installer to engage with it rather than leave emitters at the factory default.
Where MIXC kits fit best:
- Mixed beds where you need per-emitter flow flexibility
- First-time drip builders who want to dial in rates experimentally before committing to fixed-rate emitters
- Container gardens with varying pot sizes and plant types on a single zone
The Manifold Strategy: Rain Bird MANIFPRPS2 and Why It Changes the Game
A drip manifold serves two functions simultaneously: it distributes flow to multiple emitter lines, and — in pressure-regulating models like the Rain Bird MANIFPRPS2 9-port manifold — it steps pressure down to drip-appropriate levels at a single, serviceable point upstream of your emitter network.
Experienced installers who’ve worked with the MANIFPRPS2 consistently report that the thread-sealing technique is not negotiable: silicone grease on the threads, hand-tight only. Teflon tape on the plastic threads creates uneven compression that can lead to hairline cracks; over-torquing with a wrench does the same. The silicone grease approach seats threads evenly and allows future disassembly without thread damage.
There is a quality-control note worth factoring into your purchasing strategy: one reviewer documented that roughly 1-in-6 units had a leaking port on arrival. That’s a meaningful variance rate for a precision component. The practical response is to pressure-test the manifold before burying or securing it in the landscape — connect it to your supply, run the zone, and visually inspect each port with the system under operating pressure before any finishing work.
Manifold installation sequence that minimizes callbacks:
- Install your zone valve with the pressure regulator built into the valve body or immediately downstream
- Run your ½” poly mainline to the manifold location
- Grease threads, hand-tighten the manifold, pressure-test for 5 minutes before burying
- Run individual ¼” distribution tubing from manifold ports to each emitter location
- Install an inline filter upstream of the manifold — this is not optional in hard-water areas (more on this below)
The 9-port format of the MANIFPRPS2 is particularly useful for bed zones where you have clusters of plants in a defined area. Running individual ¼” spaghetti lines from a central manifold is cleaner than a long ½” mainline with inline barbed emitters every few feet — it’s easier to troubleshoot, easier to cap individual ports when plants die or are removed, and looks more intentional in an ornamental setting.
The Filter Rule: The One Upstream Component Most Owners Skip
Across aggregated reviews of drip emitters — Rain Bird, MIXC, and most competing brands — one pattern is consistent: owners who added an inline filter upstream of their emitter network report far fewer clogging incidents than those who skipped it. Fine Gardening’s overview of drip irrigation emitter rates identifies clogging as the single most common cause of drip system underperformance, and the Irrigation Association’s best practices document recommends a minimum 150-mesh filter at the head of any drip zone.
In hard-water areas (calcium and magnesium deposits are the primary offenders), a filter alone isn’t sufficient — you’ll also want to periodically flush the mainline and inspect emitter output. The cleaning interval question comes up repeatedly in the FAQ section below.
A ¾” inline Y-filter rated for 150 mesh or finer installed just downstream of your pressure regulator costs very little relative to the labor of pulling and cleaning clogged emitters mid-season.
Frequently Asked Questions
What GPH emitter should I use for established shrubs vs. newly planted annuals? Established shrubs with developed root systems typically handle 1–2 GPH emitters on a normal irrigation schedule. Newly planted annuals are better served by 0.5–1 GPH, with shorter but more frequent run times in the first 4–6 weeks while roots establish. UC ANR’s drip guidance recommends matching emitter output to root zone size, not plant visual size — a large shrub and a new transplant the same height above-ground have very different water-uptake capacities.
Do I need a pressure regulator before a drip manifold if my zone already has one at the valve? If your valve assembly already includes a pressure-regulating stem or a dedicated regulator downstream of the valve, a pressure-regulating manifold like the MANIFPRPS2 adds redundancy rather than necessity. That redundancy isn’t harmful, but it’s not required. Where you do need the manifold’s regulation is when your valve delivers unreduced line pressure to the drip zone — common in systems where the drip zone was added to an existing sprinkler valve without modifying the pressure on that circuit.
How do I cap off an emitter port when I remove a plant without buying a whole new manifold? Most manifolds, including the Rain Bird MANIFPRPS2, accept standard ¼” goof plugs — small barbed caps that press into the distribution tubing port or directly into an emitter barb hole. They cost pennies each and should be in every drip installer’s parts kit. If the port is threaded rather than barbed, a threaded cap of the appropriate size (typically ¼” or 5/32”) seals it cleanly.
Can I connect a MIXC quick-connect kit directly to a Rain Bird 6-port manifold? Compatibility depends on the port fitting type. Most Rain Bird manifolds use standard ¼” barbed ports that accept ¼” drip tubing — and most MIXC kits ship with ¼” distribution tubing. If the MIXC emitters in your kit use barbed fittings sized for ¼” tubing, connection is straightforward. Check the manifold’s port specification and the MIXC kit’s tubing outside diameter before assuming compatibility; adapter fittings are widely available if sizing doesn’t match natively.
How often should I inspect and clean drip emitters in a hard-water area? Colorado State University Extension recommends inspecting drip emitters at least once per irrigation season in normal water-quality conditions — and monthly in hard-water areas during active irrigation months. The inspection process is simple: run the zone and visually confirm each emitter is producing a visible drip. A dry emitter or one producing an irregular stream signals a clog. Soaking clogged emitters in a dilute white-vinegar solution for 30 minutes dissolves mineral deposits on most plastic emitter types. Replacement is typically more cost-effective than cleaning for emitters under $0.50 each.
Buying Decision: If X, Then Y
If you’re building a shrub-bed zone with consistent plant sizes and want reliable, install-fast emitters: The Rain Bird SW20’s off-center barb design and pressure-compensating fixed output make it the lower-friction choice for volume installs. Pair it with a Rain Bird MANIFPRPS2 at the zone head and a 150-mesh inline filter upstream.
If you’re building a mixed-use bed or container zone where per-plant flow variation matters: The MIXC adjustable kit gives you the dialing flexibility to customize output per plant — just commit to setting each emitter intentionally rather than leaving them at maximum.
Regardless of which emitter you choose: Install the inline filter. Pressure-test your manifold before burying it. And run your GPH math against your mainline capacity before you turn the zone on for the first time — the 800-lb gorilla of drip system failures is almost always a flow budget that was never calculated, not hardware that failed.